Define the ESD-safe workshop discipline
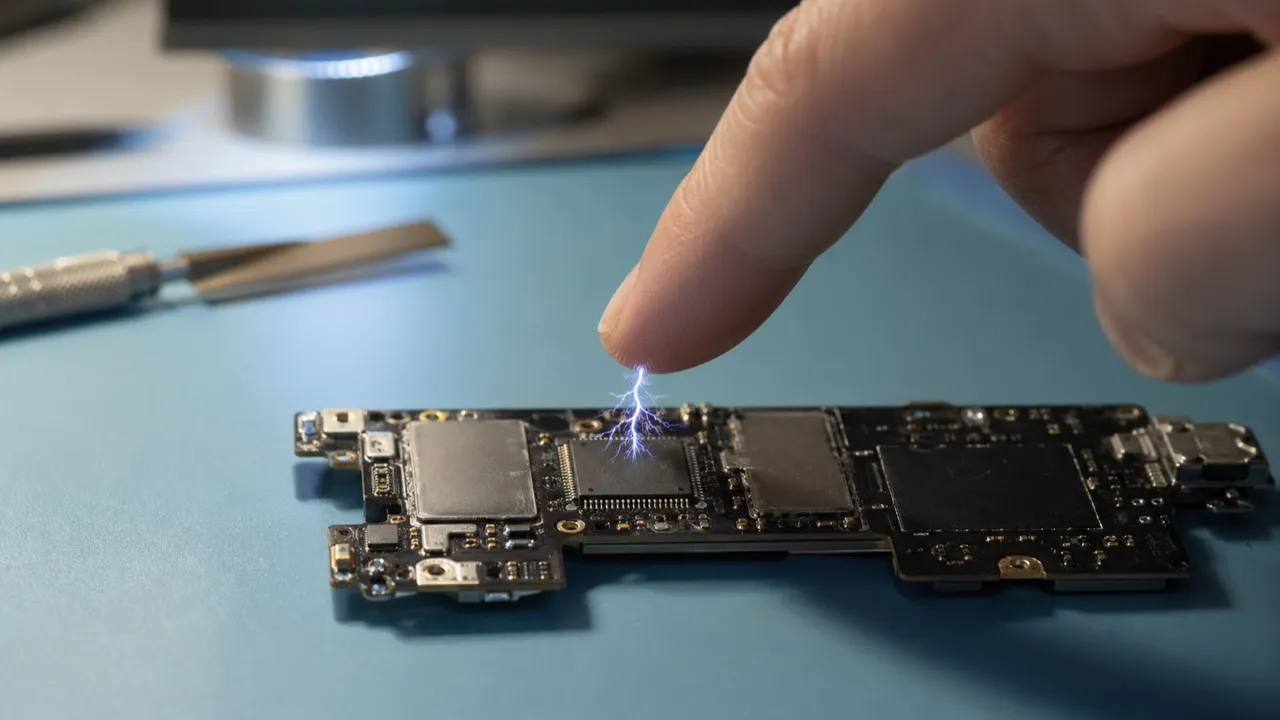
A working board sits in your hand; you haven't done anything yet, but the moment your finger brushes a pin on the board, a chip inside can silently die. Who's the culprit? An invisible spark. In the workshop, the first minute decides much of what follows.
What is ESD, and why can it kill chips without you seeing anything?
The sneakiest danger you cannot see in the workshop is ESD; the device does not always die immediately. A damaged part can keep working for a while and reveal itself later — random shutdowns, unexpected resets, or transmission errors. That is why it is an enemy that 'feels unreal' — and the sneakiest kind.
ESD (Electrostatic Discharge) is the sudden release of static charge accumulated between two surfaces. The human body can charge up to several thousand volts depending on humidity and clothing.
When that charge touches an IC pin, the gate oxide (the very thin insulating layer that separates a transistor's gate from its channel) can break down or junctions (the P-N boundaries inside the semiconductor) can suffer latent damage. Most of the damage is invisible; that is why it is hard to find by measurement — usually only behavioral change reveals it.
Which 5 elements start an ESD-safe workshop setup?
The goal of day one is not to memorize a tool catalog — it is to set up a safe working routine before you ever touch a board. An ESD-safe bench starts with five elements; the board does not go on the bench until this five-piece chain is in place.
1. ESD mat: A controlled surface that prevents the board from accumulating charge on a bare table, carpet, plastic bag, or fabric. The mat is not simply spread out; it connects from its snap point (a press-stud connector) to a grounding line.
2. Wired antistatic wrist strap: Drains static charge from the body in a controlled way. The cable typically contains a 1 MΩ protection resistor. A wireless 'antistatic strap' has no place in this course; without a continuous path, charge cannot flow.
3. Common grounding point: The wrist strap and mat connect to the same common reference point. If the clip floats in the air, the whole system becomes decoration.
4. ESD-safe tweezers or a clean-contact rule: You do not approach an IC pin with bare fingers — you approach from the edge or with proper tweezers. The pin is the door through which ESD enters the chip directly.
5. ESD shielding bag: A removed board or IC does not wait exposed on the table after the job is done; it goes into an antistatic shielding pouch.
Soldering iron, multimeter, microscope, and power supply will be covered in detail on later days. Today we are not setting up measurement tools — we are setting up permission to touch: is the mat connected, is the wrist strap connected, is the board on a safe surface?
Why do the wrist strap, mat, and grounding each have a different job?
The three elements look similar, but each has a distinct job; when they get confused, one cannot stand in for the other and false safety is born. The most common mistake: putting on the wrist strap without connecting the mat, or leaving the clip floating — visible protection is present, but there is no real path to ground.
Antistatic wrist strap — the body's charge valve
The wrist strap drains charge from your body slowly. The 1 MΩ resistor inside it has two purposes: (1) it discharges ESD buildup gradually so a sudden surge does not jump onto the board, and (2) if you accidentally touch a live wire, mains current does not flow through your body at dangerous levels. A bare connection without a resistor is not protection — it is a personal safety violation.
Correct product spec:
- A fabric band with an inner metal contact (stainless steel or copper strip) that touches the inside of the wrist.
- Coiled cable (stretches and retracts), length 1.5-3 m, with an alligator clip or a 4 mm snap (press stud) at the end.
- A 1 MΩ ± 20% resistor wired in series inside the cable. The label or datasheet states this value.
- An ANSI/ESD S20.20 (current revision 2021) compliance label is the standard for a professional workshop.
Forbidden product — wireless 'antistatic band': By physics, a strap that does not form a continuous circuit cannot perform grounding. Without a body → strap → ground path, charge cannot flow; the product is sold for years as a placebo. Open deception exists in the market on this point; real protection requires the wired version.
ESD mat — controlled resistance between board and table
The mat creates a dissipative (slow-charge-draining) layer between the board and the table. If you set a board on a synthetic plastic table, friction can build instant charge; the mat carries that charge slowly to ground.
Correct product spec:
- Dual-layer silicone or rubber: the upper layer is high-resistance (safe for the board surface), the lower layer is conductive (toward ground).
- Resistance to ground 10⁶-10⁹ Ω — the range ESDA gives for worksurfaces; test method ANSI/ESD STM4.1. (The dissipative material class is wider: 10⁴-10¹¹ Ω.) Too low and charge leaves the board fast and hard; too high and the surface behaves like an insulator (charge does not dissipate).
- Minimum size 60×40 cm — a laptop motherboard, tool boxes, and a soldering iron need to fit.
- Two snaps (upper and lower corner): the upper snap goes to the wrist strap, the lower snap to the grounding line.
- Heat resistance 200°C+ — must not melt when using a hot air station.
Forbidden product: A flat rubber mat labeled 'antistatic' — on measurement its resistance comes out far above this range; it behaves like an insulator and does not drain charge. The label is marketing. The check is not done with a multimeter between two points: resistance from the mat surface to the ground point is measured with a resistance meter using the electrode and test voltage of ANSI/ESD STM4.1. Above 10⁹ Ω, the mat is not doing its job.
Grounding — the system's common reference
This is the meeting point of the wrist strap and the mat: the common reference. Without a connection, the wrist strap is decoration and the mat is just a pretty blue surface.
Correct connection chain:
- The wrist strap is on the wrist (band + inner metal touching the skin).
- The coiled cable connects the wrist strap to the snap — inside it, 1 MΩ protection.
- The snap mates directly with the upper snap of the ESD mat.
- The mat's top surface is 10⁶-10⁹ Ω (safe for the board).
- From the mat's lower snap, a 1 MΩ resistor-equipped ground cable runs to the outlet.
- The outlet is wired to its ground pin (PE — Protective Earth).
In Turkey, the grounding line on outlets is mandatory (TS HD 60364-4-41), but in older buildings the ground line may not exist. Reading mains voltage (230 V nominal in Turkey, IEC 60038) between phase and ground on a multimeter alone does not mean the PE (protective earth) is safe — that is only an indicator signal; real verification is performed by a qualified electrician with proper test equipment (PE continuity + impedance — the total opposition the line presents to current — + RCD test). In an ungrounded or suspect workshop, driving an independent random ground rod is not the way to establish ESD grounding; building protective grounding and equipotential bonding is professional electrical installation work (TS HD 60364 family, certified electrical contractor). As a temporary solution, the ESD mat + wrist strap may be united at a common workshop reference point, but this does not replace PE.
ESD shielding bag — storing an unfinished board
When a repair is done, the board is not immediately put away; in many cases next-day testing or waiting on a customer part is required. During this time, the board is stored inside an antistatic shielding bag.
The bag's conductive layer (a metallized film, or the black diamond grid on some bags) attenuates electrostatic fields on the outer surface and works to prevent a potential difference between inside and outside. This largely protects the board from a nearby charged body and from touch; it is not an absolute shield, and the bag must be closed and intact.
Correct product spec:
- Semi-transparent metallic (aluminum vapor-deposited) or grid (conductive polymer) film.
- An ESD symbol + 'shielding' label on it.
- Size suited to the board — it should fit without bending.
- Prefer an unused bag (the inner metallic coating on old bags may be degraded).
Forbidden product: An ordinary polyethylene bag (shopping bag, nylon sack) — it charges by friction, sticks to the board, and traps static. It is the exact opposite product, the one that damages boards. In the workshop, an ESD bag is a small investment compared to the cost of a new board.
Workshop reflex: Every removed board — if it stays on the table, on the mat; if it is being stored, inside a bag. Under no circumstances does a board sit on a bare table or in a shopping bag.
Which hand habits are forbidden in the workshop, and why?
Forbidden habits (verified ESD-risk list):
- Holding an IC by its pins — the pin becomes a direct ESD path (IPC-A-610, ESD section, Chapter 3).
- Leaving the board on polyethylene wraps (shopping bags) — they charge by friction.
- Scuffing your feet on carpet — in dry air tens of thousands of volts build up; a typical value is ~35 kV.
- Wandering across the board with bare fingers (finger sweat also has corrosion side effects).
- Wearing the wrist strap but not connecting the cable anywhere.
Replacement rules:
- The IC is held by its edge or picked up with antistatic tweezers.
- It is set on an antistatic mat; an antistatic bag is used.
- ESD-safe footwear + attention to relative air humidity: in dry air far more charge builds up, but charge still forms at high humidity; humidity alone is not protection.
- Antistatic gloves or clean fingers (sweaty hands forbidden).
- The moment the wrist strap is put on, the clip goes to the common grounding point.
Visual reading: A realistic workshop-habits photograph; on one side, disorganized and risky contact; on the other, the controlled working style of a wrist-strap-connected hand.
Wearing a falsely-safe wrist strap
An apprentice sat at the bench, put on the antistatic wrist strap, snapped the grounding clip to the end of the strap cable, left it floating in the air, and touched the board. A week later the board began resetting randomly; measurement could not find the issue. Because the end of the wrist strap cable was not connected to anything, there was no path to ground.
The wrist strap only works when the grounding clip is bonded to a common reference; an end floating in the air drains no charge anywhere. A feeling of visible safety is not real protection.
- Before putting the wrist strap on, identify by eye the grounding point the clip will go to.
- The moment you put the strap on, connect the clip to that point; only then touch the board.
- If the clip is not connected, the strap is as good as not worn — in that case, do not touch the board.
What does the 5-minute preparation ritual at the start guarantee?
The moment you walk into the workshop, before the board reaches your hand, a fixed 5-minute ritual is the most reliable way to build a reflex. You will do it without thinking; because safety done by thinking is already safety not done.
5-minute ritual sequence:
- Wipe the work surface (dust + risk of invisible particles).
- Lay the antistatic mat in place; bond its clip to the grounding point.
- Take off your watch, rings, and metal bracelet; then put on the antistatic wrist strap and bond its clip to the common grounding point.
- Power on the multimeter for a mode check (you will need it later — for now, build the habit).
- Glove up or confirm a clean-finger check.
This sequence is the same every day; it does not change. The day the order changes, the habit breaks.
Visual reading: Realistic master workshop bench photo; in the middle, the board on the antistatic mat, with measurement tools beside it and separate orderly zones for removed parts.
Apply the ritual step by step
Put on the antistatic wrist strap and bond the clip to the grounding point. If you have a wrist-strap tester, put your finger on it and see PASS; if not, write down 'not tested' — a board is never touched with an untested strap. Now follow the sequence and name each step aloud.
Ready position at the bench having performed all 5 steps in order — wrist strap bonded, mat clip in place, work surface clean; the strap test result (PASS or a 'not tested' note).
Visually verify that the clip is on the grounding point; confirm with a second observer or a video that the wrist-strap cable end is not floating in the air.
How can we observe a static-generation test at home?
Seeing the reality of ESD does not require expensive equipment; two simple observations at home are enough.
Observation 1 — friction charge: In dry air (winter or an air-conditioned room) walk 5 seconds over a wool garment or carpet, then turn off the lights and slowly bring your finger near a metal door handle. In the dark you will see a tiny blue-violet spark. That spark requires roughly 3-5 kV.
Observation 2 — paper-piece test: Run a plastic comb through your hair a few times, then bring the comb close to small pieces of cut paper. The paper sticks. The static charge built up on the comb is attracting the paper.
These two tests are reminders: ESD is not an abstract concept — it is a real event you can observe every day at home. The same charge, when it touches an IC pin in the workshop, can cause damage you may not see.
- GUIDEWikipediaElectrostatic discharge — Wikipedia (comprehensive reference)↗#1
- GUIDEWikipediaIPC (electronics) — the organization and an IPC-A-610 reference (Wikipedia); not the text of the standard↗#2
- SPECESDAEOS/ESD Association Standards — ANSI/ESD S20.20 (wrist strap resistance & grounding)↗#3
- APP NOTEDESCO (ESD Association üyesi)Is it required for a wrist strap to have a resistance of 1 megohm? — DESCO (ESDA member, 5 NARTE-certified ESD technicians); quotes ANSI/ESD S1.1 + S20.20↗#4
- SPECIEC (International Electrotechnical Commission)IEC 60038:2009 — IEC standard voltages (official IEC publication page; 230 V 50 Hz value)↗#5
- SPECIEC (International Electrotechnical Commission)IEC 60364-4-41:2005+AMD1:2017 — Low voltage electrical installations, Part 4-41: Protection against electric shock (TS HD 60364-4-41 is the national adoption of this standard)↗#6
- SPECEOS/ESD Association, Inc. (ESDA)Fundamentals of Electrostatic Discharge, Part One — An Introduction to ESD (the 'Examples of Static Generation, Typical Voltage Levels' table)↗#7
- SPECIPC (electronics.org)IPC J-STD-001GA / IPC-A-610GA (Automotive Addendum to J-STD-001G and IPC-A-610G) official Table of Contents: Chapter 3 Handling Electronic Assemblies · 3.1 EOS/ESD Prevention · 3.1.2 Electrostatic Discharge (ESD) · 3.2 EOS/ESD Safe Workstation/EPA↗#8
What did you gain today?
What you learned today
- ESD is invisible but real; the human body can charge up to several thousand volts.
- The antistatic wrist strap + mat + grounding trio provides protection only when the connection is correct.
- Real safety is not established until the 5-minute workshop ritual becomes reflex.
- ESD damage is not always visible right away; a part can keep working and fail later — that is why ESD neglect is easily mistaken for another fault.
A moment from the field
In a mobile-phone repair shop, the same IC was replaced three times in a row; each time the device began shutting down randomly a few days later. The problem was not on the board but at the bench: the apprentices were wearing the wrist strap but clipping the cable to a plastic lighting fixture instead of grounding. After the grounding point was fixed, that same IC never came back.
What will you learn tomorrow?
Tomorrow we are finally ready to touch the board — but first we need to understand what we are touching: what is charge, why does it move, and what kind of a thing is a circuit?
Today's discipline fits in a single sentence: an invisible danger requires a visible routine. Tomorrow you will think about electricity with the same discipline — something invisible, but whose behavior is constant.
FREE READING
Keep going — don't lose your place.
You read this lesson without signing up. Checkpoints, progress tracking and the lesson assistant are tied to your account; a free account opens all three and picks up where you left off.
- Checkpoint questions
- Progress tracking
- Lesson assistant
No credit card required. The free tier stays open with no time limit.
AkademiUsta · CONSOLE.TR · P1_D01